What happens when a fan spins? Here you cannot see the moving blades clearly. Only a blurred view is there. This effect is called the motion blur effect. Normally in the real world, this motion blur effect is common. Motion blur effect in your videos can be identified as visual streaking that occurs due to the moving camera, object, or sometimes both. If you can add this effect to your videos it will add a more realistic nature and cinematic effects to your videos.
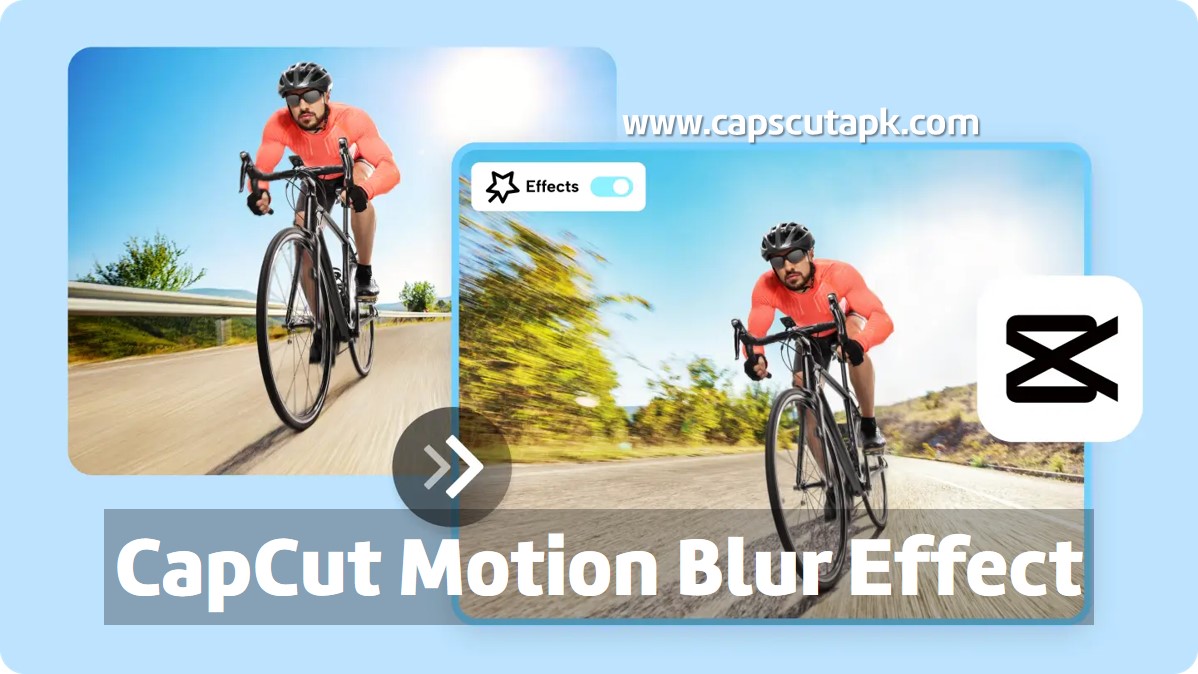
Also, this can enhance the speed of the video too. Thus, incorporating this nice tool when editing your videos makes your video more creative and attractive. Adding the Motion Blur effect is now easier than ever before thanks to the video editing app CapCut. Here is everything you would love to know about adding a motion blur effect to your videos with CapCut.
Motion Blur Effect in CapCut
By following a few simple steps, you can apply the motion blur effect to your videos edited in CapCut to make them more captivating.
Finding and Applying the Motion Blur Effect
There are two methods to apply motion blur effects to your videos. You can follow one of them as per your liking. These two methods are mentioned below.
Method 01
- First download and install the CapCut apk video editor on your Android or iOS device.
- Open the app. Tap on the ‘New Project’ tab.
- Select the video clip you want to edit and tap on the ‘Add’ button. You can select a video from your device library or the app library.
- Then you can see the editing timeline of your video clip.
- Below this timeline, you can see a horizontal panel with several editing tools.
- As the first tool, you can see the ‘Edit’ button.
- Tap on this.
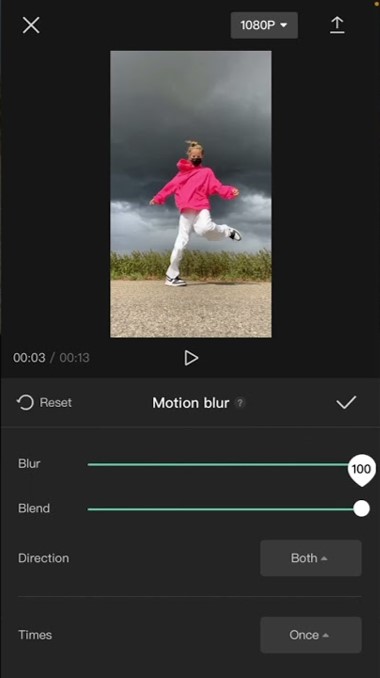
- Then scroll until you find the tab ‘Motion Blur’.
- Once you select this option you can see several parameters that you can change.
- Using a slider, you can change the Blur level and the Blend level.
- Then you can choose the direction you want to apply the motion blur effect. It can be forward, backward, or both.
- Moreover, you can select the number of times you want to apply this effect. If you choose multiple times then it will smoothen the blur effect.
- Then tap on the check mark. The effect will apply to your video. But this will take some time.
- If you shorten the video duration then the processing time will be less.
Method 02
- After the video clip is added to the editing timeline scroll the option panel to find the panel ‘Effects’.
- Tap on it. Select the tab ‘Video Effects’.
- Scroll and find the ‘Lens’ tab and tap.
- You can see several effects to choose from.
- Find and select the effect ‘Motion Blur’.
- Again, tap on the effect.
- Then you can see some parameters to adjust like Horizontal and Intensity.
- Adjust the slider the way you want and tap on the check mark.
- Play your video and see the effect.
Tailoring the Effect
To make the effect of Motion Blur smoother and precise you can try some tips.
Multiple Applications
You can apply this effect multiple times along the same editing timeline. This makes it possible to add the motion blur effect to specific parts of the video by dragging and adjusting the effect length on the timeline.
- Once you add the effect to your video you can see a layer representing the added effect under the editing timeline. You can drag and adjust this layer to the points you want.
- You can add as many layers with this effect to specific parts of the timeline.
Fine-tuning the blend
If you are an editor with advanced editing knowledge then you can fine-tune the blend feature to smoothen the transitions between the blurred and the non-blurred sections of the video clip.
- If you choose a low blend value then the transitions between the sections will be somewhat sharp. This helps you create a distinct transition.
- If the blend value is higher then you can have a smoother transition creating a more cinematic look.
Previewing and Exporting
Preview Your Work
Before finalizing and exporting the edited video clip always make sure to preview the edits you made. By previewing your video, you can double-check the changes you have made. You can preview your video simply by tapping on the play button.
Exporting with Motion Blur
After the preview, if you are satisfied with the edit you can share it with your friends or just add it to the device storage. Select the desired resolution, frame rate, and code rate, and if you like you can convert the video to smart HD. Then press the export icon. The export icon is the vertical arrow at the top right-hand corner of the interface. Then export your video after selecting the platforms you want to share your video.
Creative Uses of Motion Blur in CapCut
Here are some of the creative uses of the tool motion blur in CapCut.
Fast-Paced Action
You can use this cinematic motion blur effect for fast-paced action sequences to create a sense of speed and excitement.
Smooth Transitions
By adjusting the blend value of the effect, you can smoothen the transitions between cuts in your video.
Stylistic Effect Conclusion: Elevate Your Videos with Motion Blur
The effect of motion blur helps in creating a more artistic or cinematic look in your videos. You can add motion blur to specific parts of the videos to emphasize more on these parts.
Conclusion: Elevate Your Videos with Motion Blur
Among many artistic tools of the video editor CapCut Motion Blur effect is also earning much respect. Because this feature lets you add more realistic effects to your videos making them more cinematic. You just have to follow a few simple steps to get your work done. You can find the tool Motion Blur among the many other tools in the editing tool panel. Also, you can find the Motion Blur effect in the effect tool panel of the app. Select the best method for you and apply them. Enhance the creativity of your editing video with Motion Blur now.